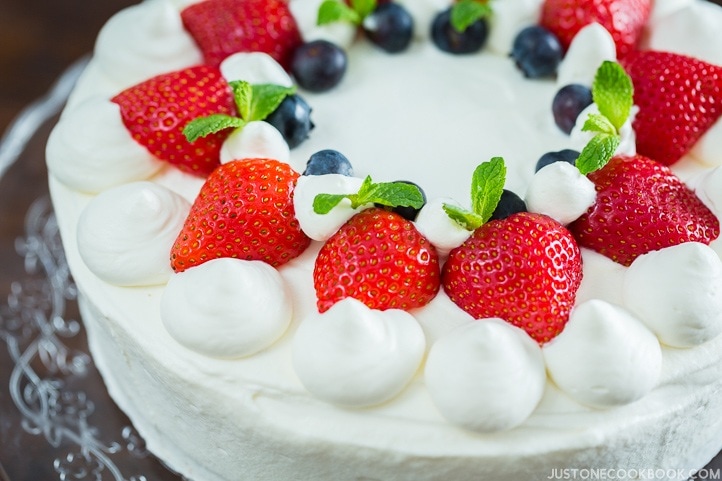
Japanese Strawberry Shortcake
Moist, airy, and light, Japanese Strawberry Shortcake is among the most popular cakes in Japan. This elegant and classic dessert is perfect for any celebration. Here, I share how to keep the sponge cake moist and decorate it with berries and fresh whipped cream.
Ingredients
- 1 Tbsp butter ((for greasing the pan; or use shortening or cooking spray))
- 3 Tbsp unsalted butter
- 2 Tbsp whole milk ((use whole milk for the best results))
- 4 large eggs (50 g each w/o shell)
- ½ cup sugar ((½ cup + 2 Tbsp, to be precise))
- 1 cup cake flour
- 2 Tbsp water
- 3 Tbsp sugar
- 1 Tbsp liquor of your choice ((optional; I like orange liqueurs like Grand Marnier or Cointreau))
- 2 cups heavy (whipping) cream ((36% fat; must be at least 30–35% fat))
- 3 Tbsp sugar
- 1 lb strawberries
- 10 blueberries
- 2 sprigs mint leaves
Directions
- 1
Gather all the ingredients. I highly encourage you to weigh your ingredients using a kitchen scale for this recipe. Click on the “Metric“ button at the top of the recipe to convert the ingredient measurements to metric. If you‘re using a cup measurement, please follow the “fluff and sprinkle“ method: Fluff your flour with a spoon, sprinkle the flour into your measuring cup, and level it off. Otherwise, you may scoop more flour than you need.
- 2
Place an 8-inch (20-cm) cake pan on top of parchment paper, trace around the pan, and cut out 1 circle. Grease one side of the parchment paper and both the bottom and sides of 1 cake pan with 1 Tbsp butter. Then fit the parchment paper in the cake pan, greased side up. I avoid parchment paper on the sides because sometimes it pulls the batter and affects the final result of the cake.
- 3
In a stand mixer bowl (Bowl #2), add 4 large eggs (50 g each w/o shell) and break the egg yolks and whites with your whisk.
- 4
In the preheated oven, bake at 350ºF (180ºC) for 20–25 minutes. Check if the sponge cake is done by inserting a skewer in the middle; if it comes out clean, the cake is ready. While the cake is baking, start preparations for the cake assembly (see below).
- 5
While the cake is baking, divide 1 lb strawberries into 2 groups, one for the decoration and the other for the filling. Keep the beautiful, same-sized strawberries for the decoration. Remove the husk and clean the strawberries with a damp paper towel (do not wash, as we don’t want the strawberries to be moist and become moldy). Slice off the core for all the strawberries.
- 6
While the cake is cooling, prepare an ice bath by placing ice cubes and water in a large bowl (Bowl #4). Place a clean and dry mixing bowl (Bowl #2) in the ice bath and add 2 cups heavy (whipping) cream and 3 Tbsp sugar to keep it cold. Tip: For the perfect sweetness, the sugar should be 8% of the heavy cream weight.
- 7
With a serrated knife, slice the cooled cake horizontally into half to make 2 layers (top and bottom).
- 8
For a basic decoration, I use a Wilton 2A decorating tip. Put the tip in the piping bag and cut off the tip so the metal will show from the bag. Fold the top half of the bag outward as you see in the picture (over your hands).
- 9
I recommend putting the cake on a cake stand with a dome or in a cake box to keep the cake shape while preventing it from drying. Keep the cake in the refrigerator and enjoy it within 2 days.