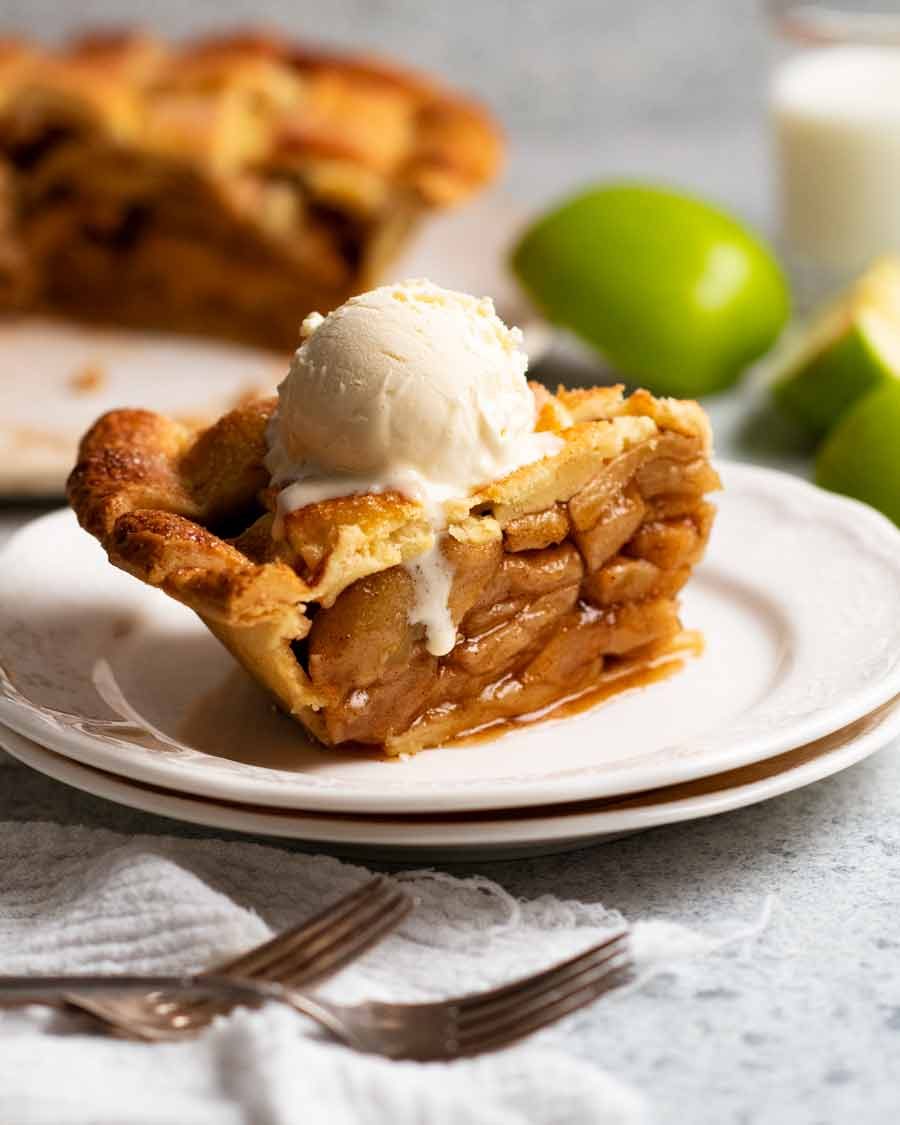
My Perfect Apple Pie
Ingredients
- 2x homemade shortcrust pastry)
this recipe, or store bought (Note 1
- 1egg
- 2 tspwhite sugar
optional), (granulate/regular, not caster/superfine
- 2kg/ 4 lb Granny Smith apples )
- 1 cbrown sugar
- 1 tspground cinnamon
- ½ tspground ginger
- ¼ tspground nutmeg
- ¾ tspcooking/kosher salt
- 1 tspunsalted butter
- Vanilla ice cream
cream
Directions
Pie crust:
- 1
Shortcrust: Make a double batch of my shortcrust pastry recipe. Form the dough discs, wrap and refrigerate per the recipe.
- 2
Line tin: Roll out one dough just large enough to fit a 23cm/9" metal pie tin, following directions in the shortcrust recipe. You want the base relatively thick so it's sturdy. Trim off excess pastry, prick the base 30 times with a fork (don't pierce through).
- 3
Freeze (Note 4): Cover with cling wrap and freeze for 2 hours.
- 4
While crust is freezing, make apple filling. Then continue with pie crust steps.
- 5
Preheat oven to 200°C / 400°F (180°C fan).
- 6
Blind bake (Note 5): Place two large sheets of baking/parchment paper in a "X" over the pie tin then fill with baking beads (Note 4). Bake 25 minutes.
- 7
Egg wash (Note 5): Remove from oven. Use paper excess to remove beads into a bowl. Brush base and sides (not rim) lightly with whisked egg. Return crust to oven for 5 minutes.
- 8
Cool: Crust should be light golden and look fully cooked. Cool 15 minutes before filling.
Lattice (note 6 for full lid):
- 1
Remove remaining dough from fridge 30 minutes prior. Roll out to 3 mm / 1/8" thick and cut into 12 x 2.5cm/1" strips. Transfer to board, cover with cling wrap and refrigerate until required.
Apple pie filling:
- 1
Preheat oven to 180°C / 350°F (160°C fan).
- 2
Spice mix: Mix the sugar, cinnamon, ginger, nutmeg and salt in a bowl.
- 3
Toss: In a large bowl, sprinkle spice mix over apple slices. Toss well with hands, separating pieces that are stuck together.
- 4
Bake: Spread across 2 large trays. Bake until soft but still holding form - check first at 15 min, and every 5 mins thereafter (mine take 40 min - Note 7). Do not stir or rotate trays.
- 5
Drain off juices: Remove trays from oven. Using a spatula to hold the apples back, pour apple juices into a saucepan (drain off what you can, you don't need every drop).
- 6
Cool apple: Leave apple slices to cool on the tray, about 15 minutes.
- 7
Apple syrup: Add butter to apple juice saucepan and simmer on low heat until it reduces to 1/3 cup (80 ml), becoming syrupy. This might take 1 minute if you didn't start with much juices, or 3 - 5 minutes if you started with 1/2 cup or more juices. Remove from stove and let cool.
Assemble and bake:
- 1
Turn oven up to 200°C/400°F (180°C fan).
- 2
Fill: Use a spatula or egg flip to scoop up apple slices. Fill the pie crust with 2/3 of the apples, gently pressing out air pockets. Then arrange the remaining apples on top so they mound slightly at the centre. Pour apple syrup over the slices and any residual juices from the baking trays.
- 3
Pastry lattice or lid: Top with pastry lattice - see in post for my method. Trim excess, and press to adhere on to pie crust rim using water to seal. Brush lattice with egg wash (avoid the pie rim else it will over-brown there), ensuring you don't get pools of egg in the joins. Sprinkle with sugar.
- 4
Bake 45 minutes or until the pastry is golden and you see the syrup bubbling through the lattice.
- 5
Serving fresh: Cool at least 3 hours before cutting to serve!
- 6
Option for neat slices: After cooling, refrigerate overnight. Turn pie out of pie dish (it's sturdy enough once cooled). Then you can cut neat slices. Place on a tray, cover with foil and reheat for 10 minutes in a 180°C/350°F oven (or microwave in emergency!).
- 7
In either case serve with vanilla ice cream, always!
My Perfect Apple Pie
Ratings & Reviews
Be the First to Rate
Your rating helps others discover amazing recipes. Share your experience and let others know what you think!
About this Recipe
Discover My Perfect Apple Pie: A Game-Changer for Dessert Lovers
Are you tired of soggy apple pie crusts, unevenly cooked fillings, or that disappointing empty space under your pie lid? If so, get ready to experience My Perfect Apple Pie – a truly superior dessert that will transform your apple pie expectations. This isn't just another basic apple pie recipe; it's a meticulously crafted method designed to deliver unparalleled flavor and texture in every single bite.
What makes this apple pie truly perfect? The secret lies in two key techniques: pre-baking the apple filling and blind-baking your pie crust. While many recipes simply pile raw apples into an uncooked crust, our approach ensures that your apples are perfectly tender and flavorful, preventing any raw patches or a giant cavity post-baking. Simultaneously, blind-baking the crust guarantees a crispy, flaky base that stands up beautifully to the luscious filling – no more soggy bottoms here!
This recipe is specifically engineered for Granny Smith apples. Their firm texture and tartness hold up incredibly well during the pre-baking process, providing the ideal balance against the sweet brown sugar and warming spices like cinnamon, ginger, and nutmeg. Using other apple varieties might result in a filling that's too soft or lacks the necessary structure, so for truly perfect results, stick to Granny Smiths!
The outcome is an irresistibly delicious apple pie with a rich, perfectly spiced apple filling nestled in a golden, crisp crust. It's the ultimate comfort food, ideal for holidays, family gatherings, or simply a cozy evening treat. Serve it warm with a scoop of vanilla ice cream or a dollop of fresh cream for an unforgettable dessert experience.
Tips for Success:
- Don't skimp on apple prep: Peeling, coring, and slicing the Granny Smiths consistently ensures even cooking.
- Embrace the blind bake: This step is crucial for preventing a soggy crust.
- Spice it right: The blend of cinnamon, ginger, and nutmeg provides that classic, comforting apple pie aroma and taste.
Get ready to bake the apple pie of your dreams!