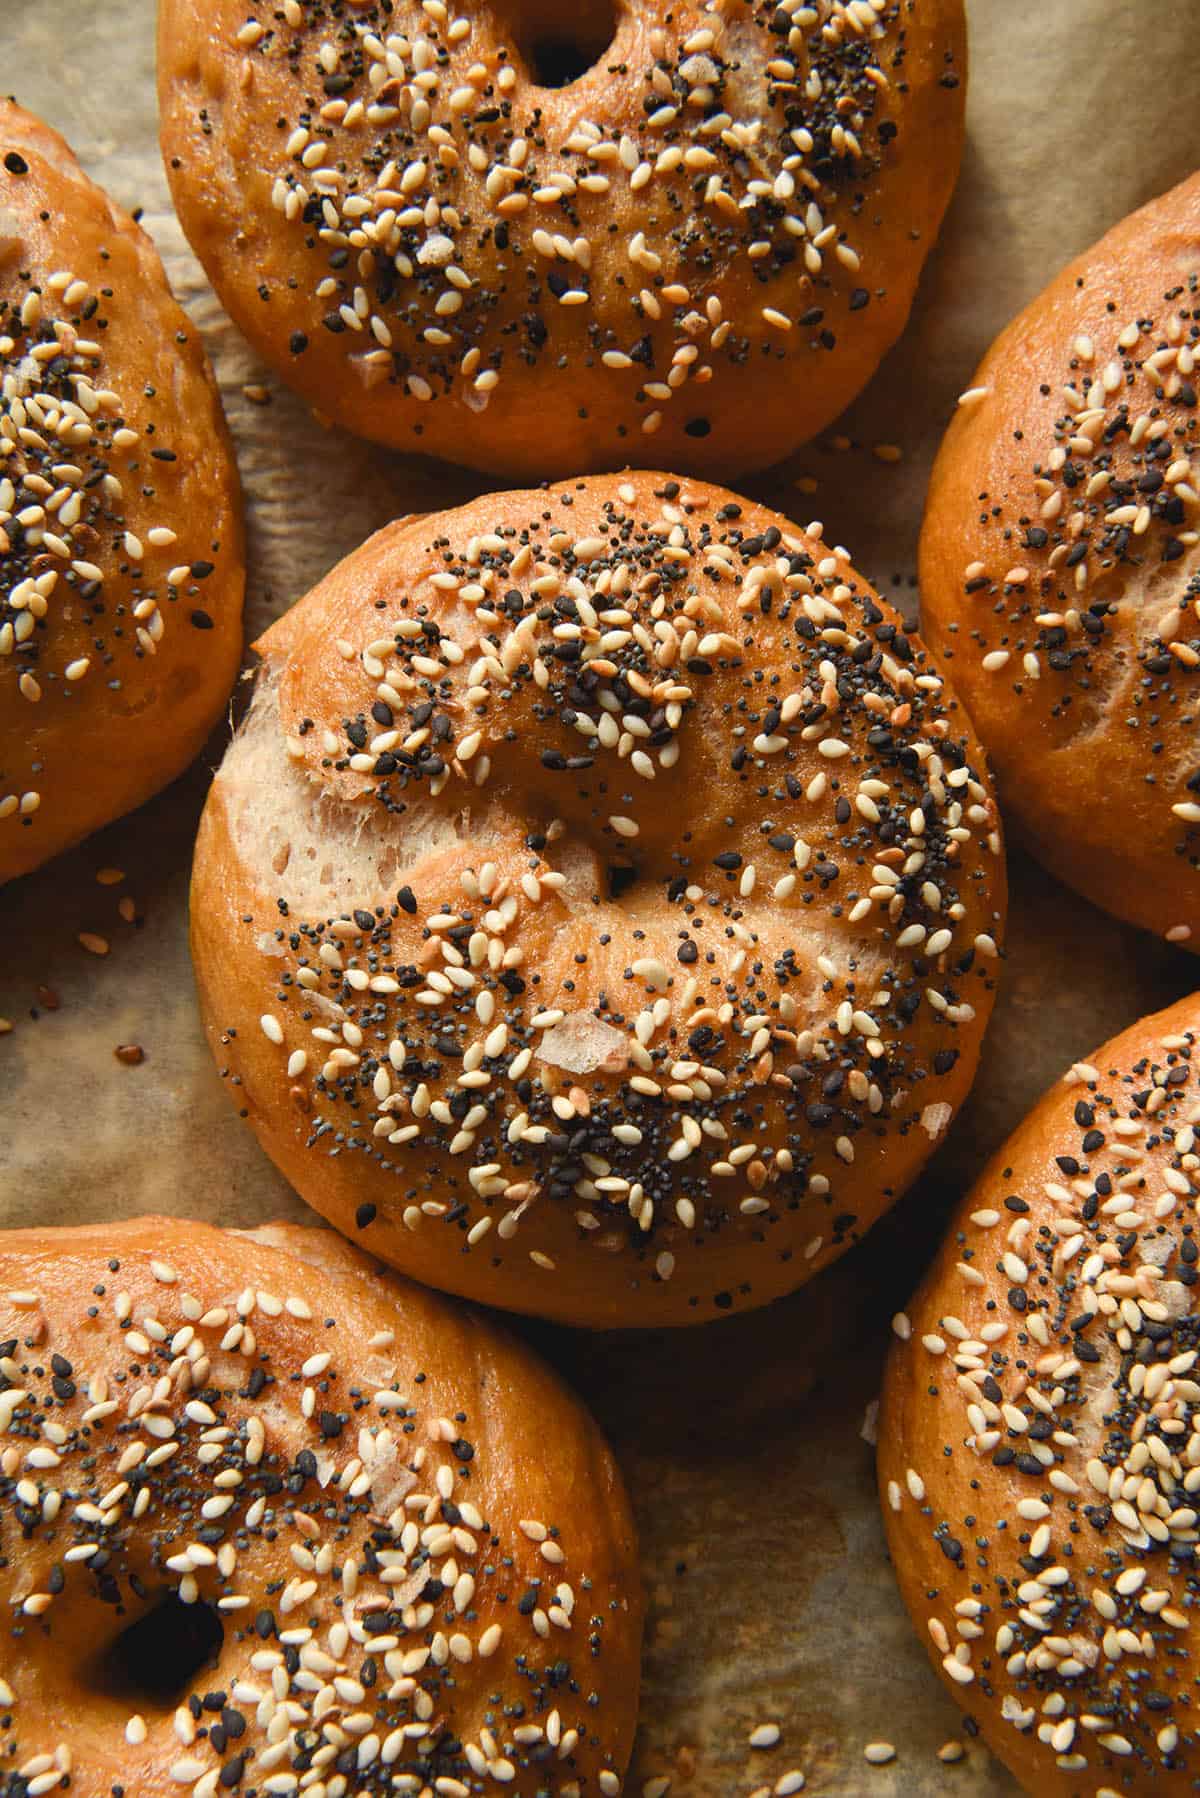
Gluten free vegan bagels
Ingredients
- 220 g* white rice flour
1 1/2 cups
- 80 g* sorghum flour
1/2 cup
- 150-165 g boiling water
- 120 g* tapioca flour
1 cup
- 15 g psyllium husk powder
- 7.5 g instant yeast
1 sachet
- 1 – 1 1/2 teaspoons fine salt
to your taste
- 1/2 tablespoon sugar
- 60ml* vegetable or plain oil
1/4 cup
- 250-310 ml* warm water
1 – 1 1/4 cups
- 1 tablespoon molasses for water bath
you can use whatever sort of water bath you like
- Salt
for boiling water
- Vegan egg wash of choice
see notes
- Everything bagel seasoning or your topping of choice see body of post or notes section for a link to a FODMAP friendly everything bagel recipe
Directions
- 1
Weigh the sorghum and rice flour in a medium sized mixing bowl and stir to combine. Measure 100g of that flour into another small bowl and set aside. This small bowl will form our scald
- 2
Pour 150-165g of boiling water evenly over the flour in the smaller bowl to make the scald. Have a whisk at the ready and vigorously whisk until a jelly like dough forms. It shouldn’t take more than 5-10 seconds. Set aside to cool a little.
- 3
Add the tapioca flour, psyllium husk powder, yeast, salt and sugar to the larger, original bowl of flour. Whisk and set aside.
- 4
Pour the contents of both bowls into your kitchen mixer with the paddle attachment.
- 5
Process the dough on a low speed for 2-3 minutes until the scald has broken up completely in the dough. Drizzle in the oil, followed by the water, until a soft and pliable but not completely wet dough has formed. The higher hydration, the more open the crumb, but it can come at the expense of a gummy bagel. Add the water by sight and add the lesser amount if it’s your first time baking these bagels.
- 6
Cover the dough and place into the fridge for 30 minutes to firm up and proof a little. Read the proofing notes section and choose the style of proofing you'd prefer. For the recipe card, we're assuming the bagels are not being proofed after shaping.
- 7
While you wait, thoroughly preheat the oven. I like to preheat mine at 220C/430F to ensure it is at the right temperature for good oven spring.
- 8
Fill a medium pot 3/4 of the way with water, and add the molasses and salt. Set it over a medium heat and bring to a boil.
- 9
Take the dough out of the fridge and divide it into six or eight balls
- 10
Depending on how hydrated the dough is, you may need to lightly flour the bench (I use tapioca flour) or you may not.
- 11
To form bagels, you can either roll out each piece of dough into a log and then brings the ends firmly together (use water on the ends to ensure they seal together) or you can form bagel sized disks of dough and use an oiled finger to create the bagel hole. Visually, I prefer the first option, but the second option is a bit easier and more foolproof.
- 12
When the water has boiled, place each bagel into the water for 30-45 seconds. They don’t automatically float, so have a spatula on hand to very gently encourage it off the bottom if necessary. Place each bagel on a cake rack to drain the excess water while you boil the next one.
- 13
Once you have boiled all the bagels, place them on a lined baking tray. Brush each bagel with egg wash or an alternative, and then sprinkle with your chosen topping. Place into the oven, adjust the heat to 200C/400F, then bake for 25-35 minutes or until golden, puffy and firm.
- 14
If you are using a high hydration, wait until the crumb sets to eat one or else your bagel will be gummy. Leftovers keep really well for a number of days and can be frozen (I like to slice them prior to freezing).
Gluten free vegan bagels
Similar Recipes


Ratings & Reviews
Be the First to Rate
Your rating helps others discover amazing recipes. Share your experience and let others know what you think!
About this Recipe
Craving a classic bagel experience without common allergens? These gluten-free vegan bagels are your answer, meticulously crafted to be nut-free, dairy-free, egg-free, and completely free of xanthan gum. You'll finally enjoy homemade bagels that cater to a wide range of dietary needs without compromise.
Why This Recipe Works
This recipe shines by expertly blending white rice, sorghum, and tapioca flours, creating a foundation that yields a truly satisfying gluten-free texture. The inclusion of psyllium husk powder is key, providing essential structure and chewiness often missing in gluten-free baking, all without the need for xanthan gum. Plus, the emphasis on gram weights for international accuracy, alongside Australian cups and measures, ensures reliable results every time you bake.
What to Expect
Prepare for a delightful bagel that boasts a crisp, subtly chewy crust and a soft, resilient interior, reminiscent of your favorite bakery bagels. Despite being free from gluten, dairy, eggs, and nuts, these bagels deliver that familiar, comforting flavor you've been missing. The process, including a traditional water bath with molasses, contributes to their characteristic golden-brown exterior and authentic bagel chew. This recipe yields 6 large or 8 medium bagels, perfect for sharing or enjoying throughout the week.
Customization & Variations
Get creative with your toppings! While everything bagel seasoning is a fantastic choice, feel free to use poppy seeds, sesame seeds, or a sprinkle of coarse salt before baking. For a different flavor profile, consider incorporating dried herbs into the dough. You can also experiment with your favorite vegan cream cheese or plant-based spreads to complement the rich flavor of the bagels.
Serving & Context
These versatile gluten-free vegan bagels are perfect for a hearty breakfast, a satisfying lunch sandwich, or a wholesome snack. Serve them warm with your favorite spreads, or pile high with your preferred sandwich fillings for a delicious, allergy-friendly meal.