
How To Make Bánh Mì (Vietnamese Baguette)
Ingredients
- 170 ml water
at room temperature
- 250 g bread flour)
(at least 12% protein
- 1 tsp bread improver
- 3/4 tsp dry yeast
- 1/2 tsp sugar
- 1/4 + 1/8 tsp salt
- 1/8 tsp vitamin C
from powder or a crushed tablet
- 2 tbsp vegan butter
for brushing
Directions
- 1
Add the water, bread flour, bread improver, dry yeast, sugar, salt, and vitamin C to the bowl of a stand mixer fitted with the dough hook.
- 2
Mix on speed 2 for about one minute, or until everything is combined. Use a spatula to scrape down the sides if needed. Now, increase the speed to the maximum (10 on a Kitchenaid), and let the stand mixer knead at full speed for about 8 minutes. Keep an eye on it as it will move because of the speed.
- 3
Using slightly oiled hands, transfer the dough to a greased countertop or smooth surface. The dough should be elastic and very sticky, that's normal. Cover the dough with a bowl upside down and let it rest for about 20 minutes.
- 4
Preheat your oven to its lowest temperature (about 86°F/30°C). If it cannot go that low, just turn the oven light on. Place a baking sheet filled with warm water in the bottom of the oven. Grease two baguette pans with an oiled kitchen paper towel and set aside.
- 5
After 20 minutes, divide the dough into 6 balls of about 70g each. This is the regular size of banh mi, however if you want bigger baguettes, divide the dough into 5 pieces of 84g.
- 6
To shape: slap a ball of dough on your greased working surface, then use your hands to flatten it into a thin rectangle. Next, roll it out into a roll of about 5-inch long (see photos and this video to get an idea of how to shape the baguettes). Transfer to the prepared baguette pan and repeat with the remaining balls of dough.
- 7
Wet two lightweight cheesecloth and place them on the baguette pans, this will prevent the baguettes from drying and forming a crust. Place the baguette pans in the preheated oven and let the dough rise for about 2 and a half hours. Check after 1 hour and re-arrange the cheesecloth if needed (since the dough will rise, you might have to carefully remove the cheesecloth and replace it on top so it doesn't stop the dough from rising well).
- 8
Once your dough has quadrupled in size, remove the pans from the oven but keep the cheesecloth on top. Preheat the oven to 475°F (247°C) and place an iron skillet in the bottom of the oven. This will help retain heat better. Let the oven preheat for at least 25 minutes.
- 9
Boil about 3 cups of water. In the meantime, remove the cheesecloth and spray the dough with water. Using an oiled razor blade (or very sharp knife), score each loaf with 2-3 cuts. Tip: Hold the blade at a 45° angle (not perpendicular) and make cuts of about 1/2 cm deep.
- 10
Spray with water once more. Now, place your baguette pans into the oven and pour the boiling water into the iron skillet. Immediately close the oven door and turn off the oven fan.
- 11
Bake for about 17 minutes, or until the banh mi are golden brown. Do not open the door during baking. Once your banh mi have a nice color, carefully flip them upside down and bake for another 4 minutes, or until the bottom is golden brown as well.
- 12
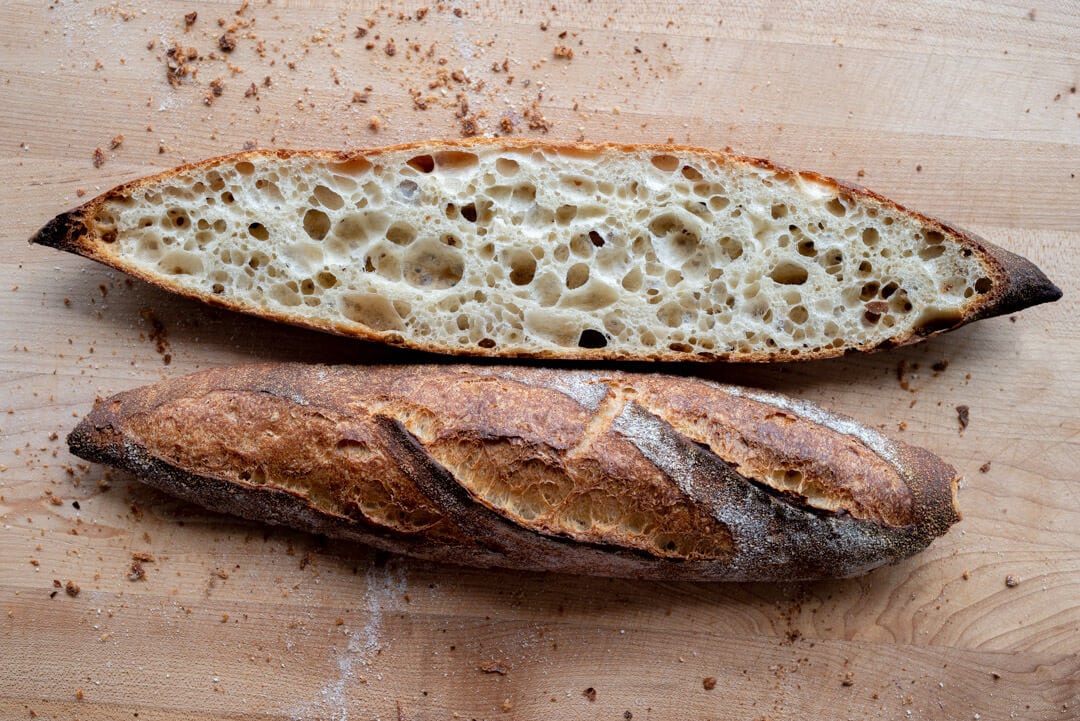
Remove from the oven and hear them crack! Some cracks should appear very quickly, that's one of the characteristics of a good banh mi. If you want them to have a nice shine, lightly brush them with melted vegan butter and let them cool a bit before eating.
- 13
Banh mi are best eaten the same day, the crust is super crispy and the crumb so fluffy! You can keep them for up to 3 days at room temperature in a bread bag. They will become softer the next day, but you can reheat in a preheated oven to make them crispy again.
How To Make Bánh Mì (Vietnamese Baguette)
Similar Recipes


Ratings & Reviews
Based on 43 ratings
Rating Breakdown
About this Recipe
Dreaming of biting into a truly authentic Vietnamese Bánh Mì sandwich, complete with that perfectly crispy, yet light baguette? Look no further. This recipe brings the bakery experience right to your kitchen, allowing you to craft your own irresistibly delicate Vietnamese baguettes.
What makes this recipe stand out is its dedication to replicating the elusive texture of traditional Bánh Mì bread. The secret lies in achieving a super thin, shatteringly crispy crust that gives way to an incredibly light and cottony interior. This precise balance is what sets these loaves apart, making them the closest you’ll get to the real deal at home.
Prepare for a truly satisfying baking experience. The exterior of these baguettes will boast a beautiful golden hue and a remarkably delicate crispness that crackles delightfully with every bite. Inside, the crumb is wonderfully soft, almost ethereal, and subtly chewy, providing the ideal foundation for any filling you choose. Achieving this texture requires attention to specific ingredients like bread flour with at least 12% protein and a touch of vitamin C to optimize the dough.
This recipe is meticulously designed for a specific outcome, but you can consider a few elements. The recipe already calls for vegan butter for brushing, making the crust entirely plant-based and contributing to its rich flavor and golden finish. For those exploring the nuances of bread making, understanding the role of bread improver and vitamin C in achieving the signature crumb is key.
These freshly baked Bánh Mì baguettes are, of course, the ultimate vessel for your favorite Vietnamese sandwiches. They also make a fantastic accompaniment to hearty soups, fresh salads, or simply enjoyed on their own with a smear of butter.